Are you looking for a quick way to add a touch of spring to your front door or home this season? Try adding a wreath! You’ll have it done in no time by using this simple and easy guide
Learning how to make a spring wreath is one of the best ways to add elements of the blooming season to your home. In addition to spring cleaning and rosemary-lemon pot simmers, this is the perfect accessory to liven up your space and bring a touch of the outdoors inside.
I personally look forward to making wreaths year-round because it’s a really affordable way to embrace the changes in nature without having to break the bank. Typically, I make (or slightly adjust) four wreaths per season: one for the front door, entryway, and two smaller ones for large kitchen cabinets.
In this post, you will see exactly how I made my Spring 2022 front door wreath and I’ll share everything from which materials were used, the project budget, how to work without glue, and more!
After reading this, you’ll have all the deets required to create your own fabulous spring wreath (or any other season) in just a few, easy steps.
This post is all about how to make a spring wreath.
HOW TO MAKE A SPRING WREATH
Step 1. Find Floral #Inspo
The first thing you want to consider when making a seasonal wreath is which types of florals and foliage you want to use. Some people get inspo from internet trends and others may be inspired by what’s blooming outside their windows.
I typically do a mix of both and am always inspired by fresh sprouts I see on my morning walks. This season I noticed tons of beautiful blossoms all over the trail, and internet, so I wanted to bring them together for this wreath.
But, if you’re not sure where to begin, I would recommend searching on Pinterest to find inspiration.
When I do this, I start by searching for “Spring Wreaths” to see what comes up. If I already know the flowers I want to use, then I search for different arrangements of those instead. From there, I save anything that looks like my ideal wreath or gives me inspiration for customizing my own.
The best part is that once these are saved, you can use them as guides when you’re shopping or when it’s time to assemble your wreath.
I highly recommend doing this step before heading to the craft store so that you have an idea of what you want and can stick to the budget without purchasing unnecessary items. This also promotes responsible sourcing of outdoor materials for live wreaths.
For the purpose of this project, I’ll be creating a faux wreath with blossoms (white, peach, and variations of pink) and off-white foliage.

Step 2. Pick Your Wreath
Once you decide on flowers and foliage, you’ll need to choose the base or frame for your wreath. There are so many options to choose from including: wire, metal hoops, grapevine, foam, straw, PVC, and more.
When I’m picking a wreath, my main objective is to find one that can be recycled from season to season and won’t require glue. So grapevine and wire wreaths have helped me to accomplish the goal because I can curve stems around the vines, or wires, and secure them with easily removable pieces, if needed. Styrofoam is also a great base for glue-less options.
Do quick research online to see if your preferred wreath-type is available in your local craft store. I bought the wreath below from Michaels but have seen all types in other stores like Hobby Lobby, Dollar General, and World Market.
Additionally, because of the construction of the wreath, it’s easy to hide the nail or magnet used to hold it up. Just be sure to wipe down or sweep any branches off any surfaces you used after your wreath is assembled.
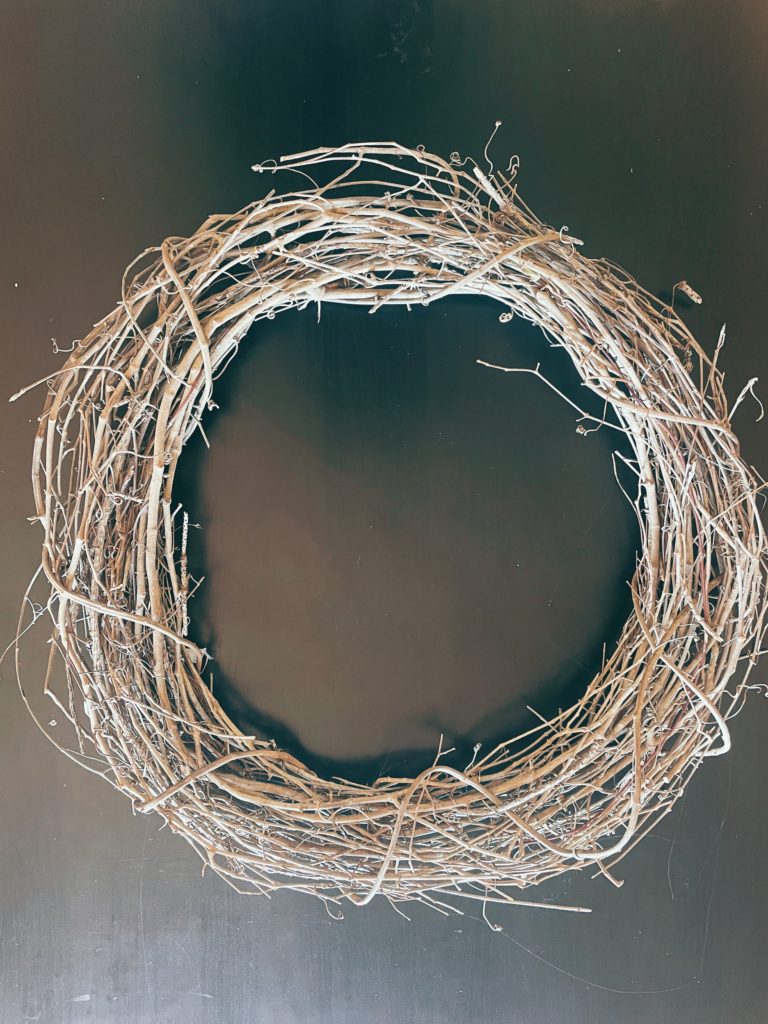
Here’s a picture of my grapevine wreath:
Step 3. Gather Supplies
So now that you’ve decided which wreath-type and arrangements are best for your project, I will share more details about the materials I used, including budget, item costs, and where everything was purchased.
Budget: $20.00-$70.00
If I’m creating a new wreath from scratch, I usually allow for a wider budget of $20.00-$70.00 because I intend on reusing each item for the next few years. In my storage closet, I have all kinds of seasonal flowers and vines that make it easy to put a wreath together in a snap. For this project, however, I wanted something fresh because I’ve been recycling bundles of lavender and baby’s-breath for the past two years.
Since I already had the grapevine wreath and other supplies, like cutters and a magnet, my total spend for this project was $31.98. You can save more by ordering online, using seasonal coupons, and utilizing flowers and foliage from previous projects.
Supplies: $31.98-$66.93
Peach Blossom Stem
Cost per item: $5.00
Used for this project: 4 stems x $5.00 = $20.00

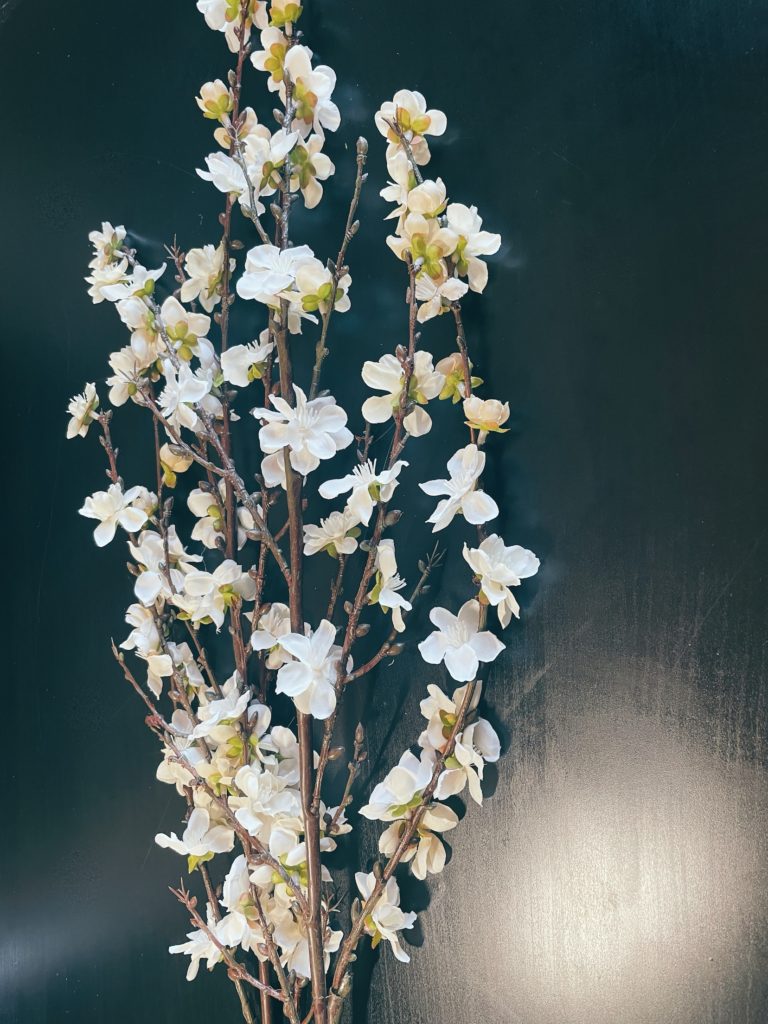
Off-White Blossom Spray
Cost per item: $5.99
Used for this project: 2 stems x $5.99 = $11.98
24″ Grapevine Wreath
Cost per item: $3.99 – $24.99
Used for this project: 1pc x $9.99 = $9.99
*I love a large wreath so I bought the 24″ 2 years ago but the 18″ would have worked fine and saved me $4.00*

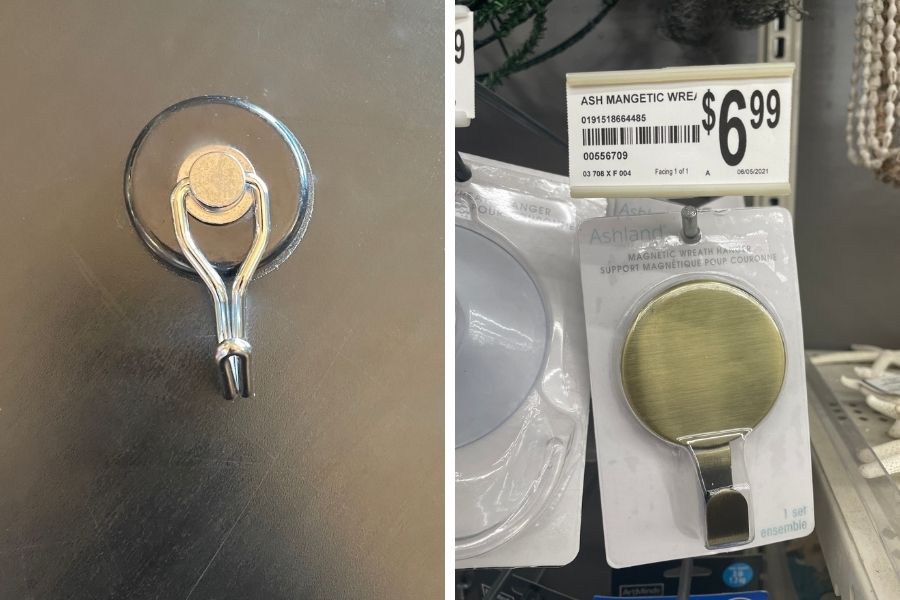
Hanging Magnet
Cost per item: $3.00-$25.00
Used for this project: 1pc x $14.50 = $14.50
*My husband purchased this for me at Home Depot (L) but if I made the switch from command hooks to magnets sooner, I would have purchased it for $6.99 at Michaels (R). These are perfect for ensuring your wreath does not fall down, even if it’s windy!*
Wire or Floral Cutters x 1
Cost per item: $3.00-$25.00
Used for this project: 1pc x $5.99 = $5.99
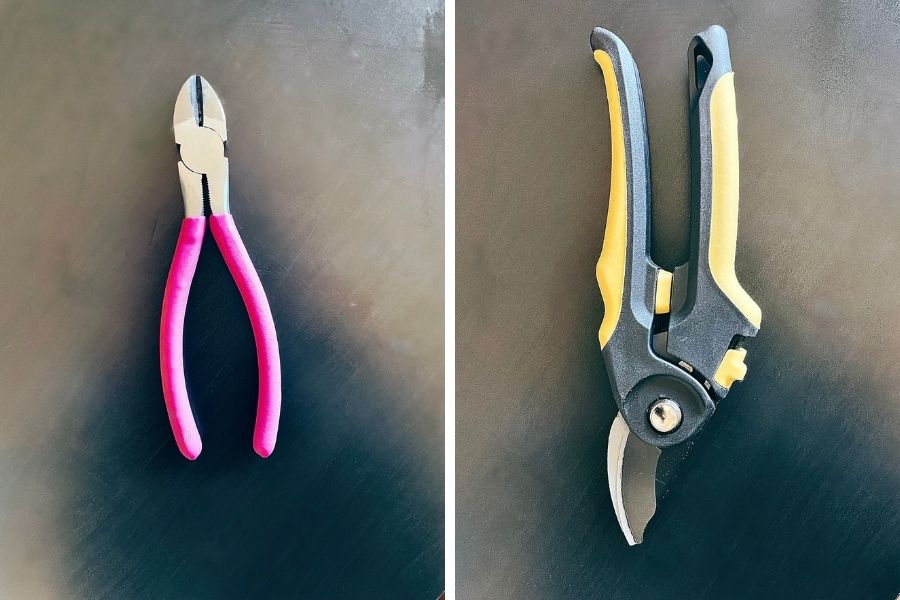
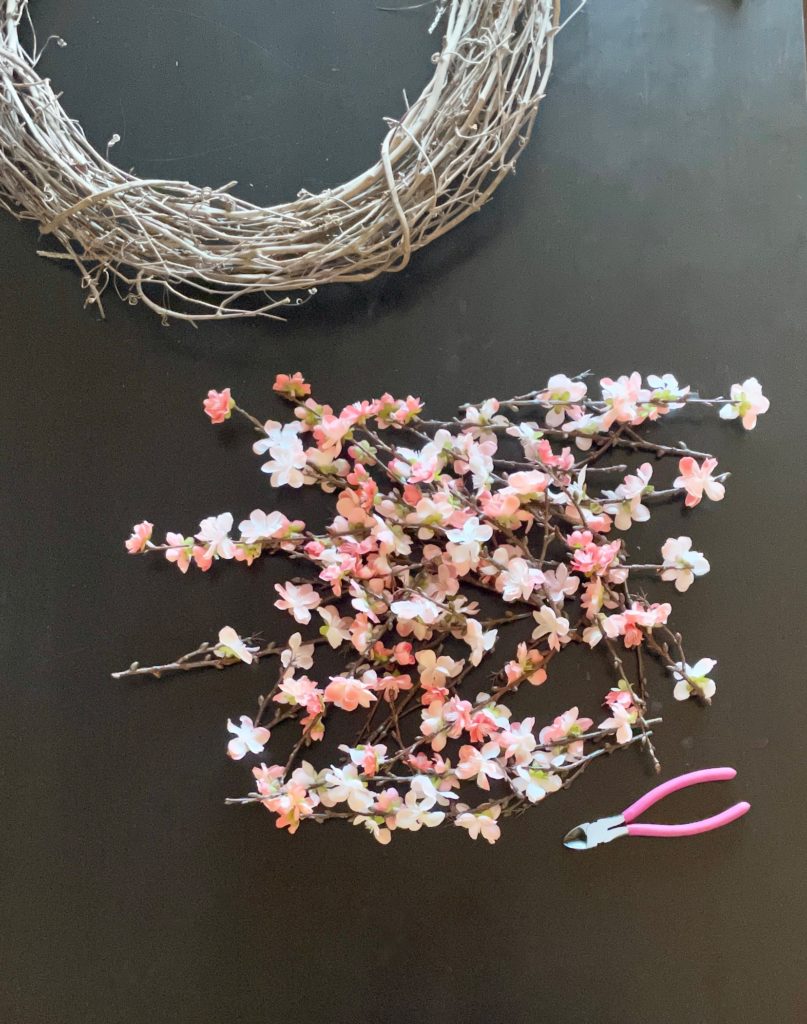
*Depending on the size of the stems I need to cut, I will use one of the below cutters. Since the blossom branches were pretty small, I used the pink pair which I purchased a few years ago at Hobby Lobby. There have also been times when the branches, not the main stem, have been small enough to cut with scissors so cutters would not be necessary in this case. For larger stems or branches, I use the yellow pair that I stole from my hubby’s tool chest ;)*
Overall Cost Breakdown:
New Florals Only: $31.98
All Florals + Tools: $37.97 + $22.97 = $57.97
Step 4. Assemble
1. Pick a spot to assemble your wreath. I usually opt for the floor or a table so that I have enough space to spread out.
I assembled this entire wreath from my living room in about 15 minutes.
So grab your wreath and let’s get started!

2. Now that your wreath is laid out, gather your flowers and make sure to leave all tags on them until you have a spot for each item on your wreath.
By leaving the tag on, you’ll be able to return unused pieces, if desired.
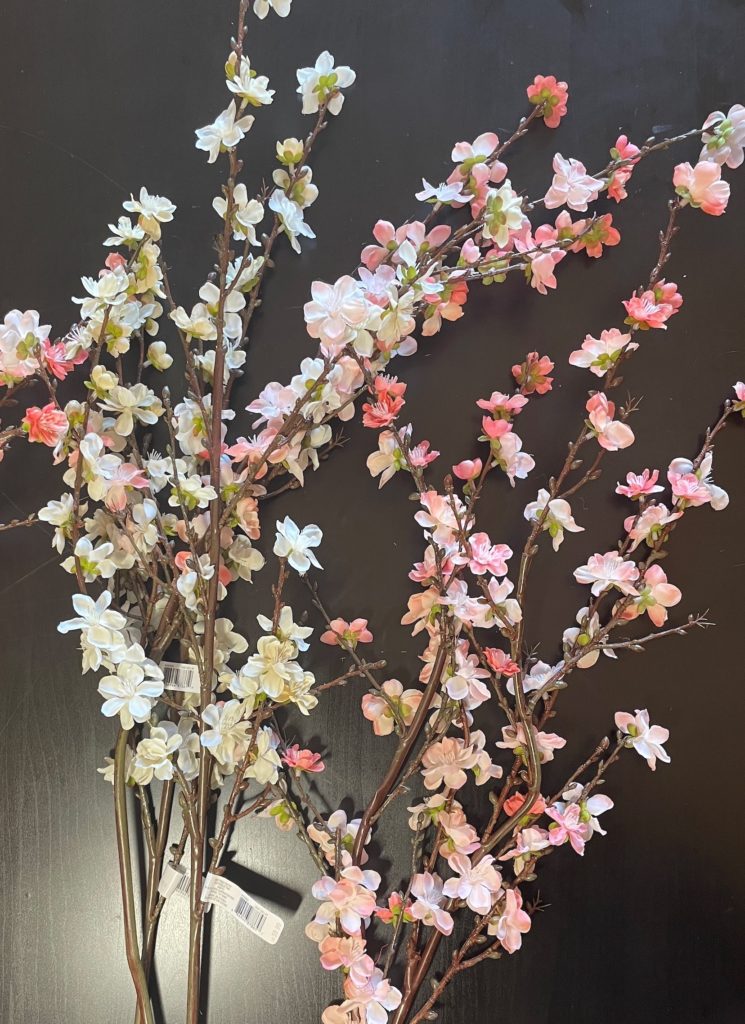
3. Choose your base flower and begin laying them on top of the wreath to get an idea of how you want them to be positioned. At this point, all branches are still attached to the larger stems but they will be removed later.
I began with the peach/pink branches first and I will repeat this step with the white blossoms once I’ve used them all up.
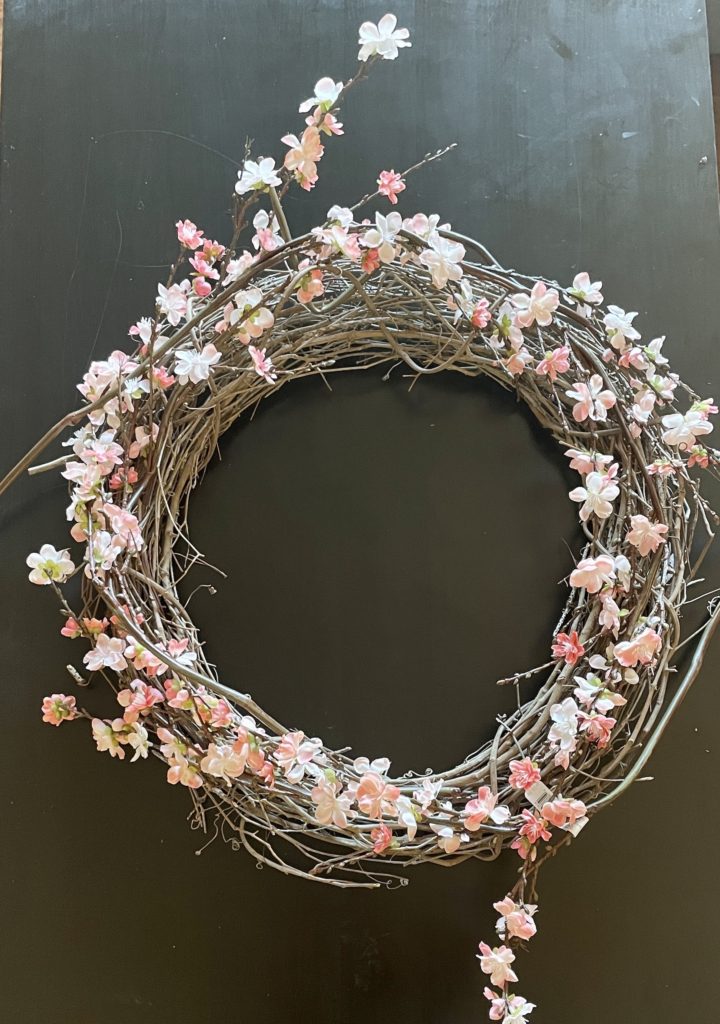
4. When you’re set on the layout, start cutting smaller branches from the larger stem and bend them slightly to match the overall curve of your wreath.
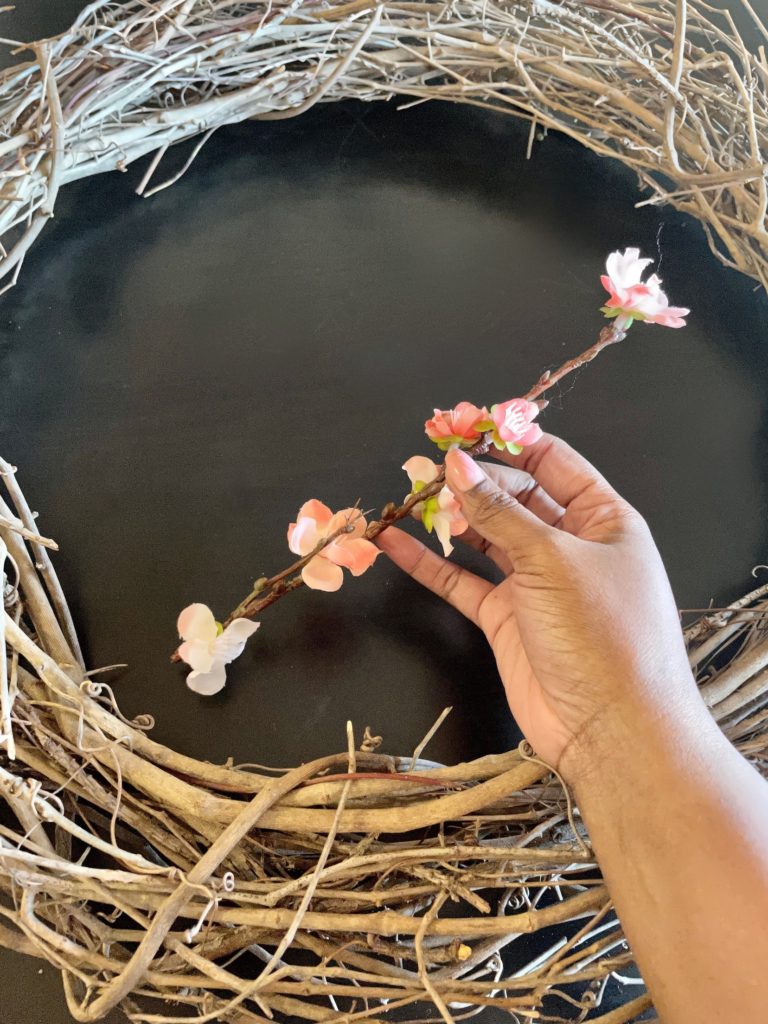
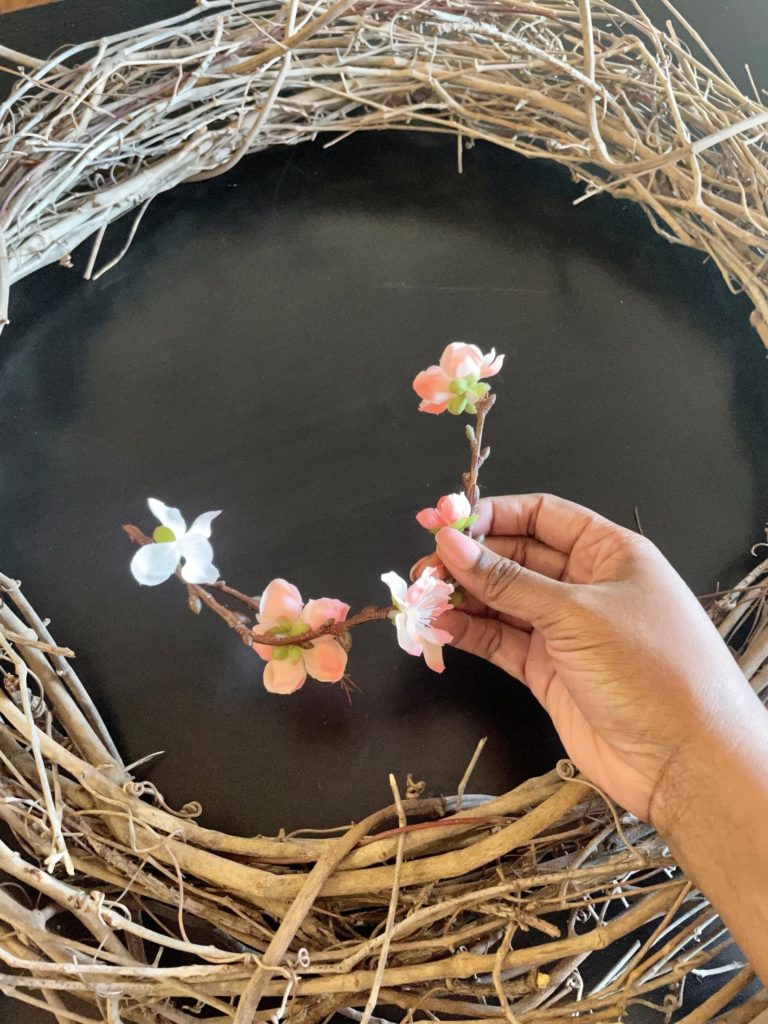
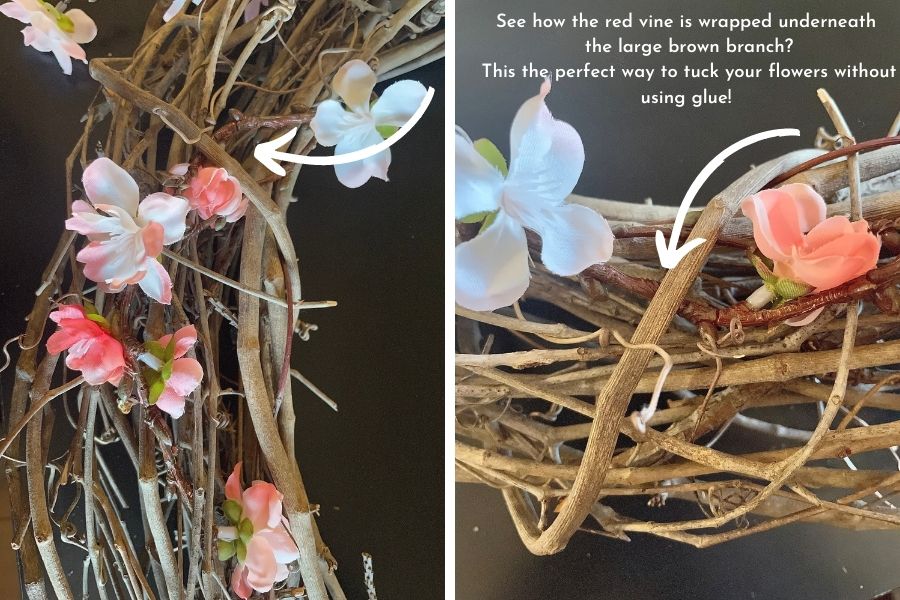
5. Now tuck all the peach/pink pieces underneath the vines until you’ve used them all and have lined the entire wreath.
Here is what the wreath looks like with all four of the peach/pink stems securely attached:
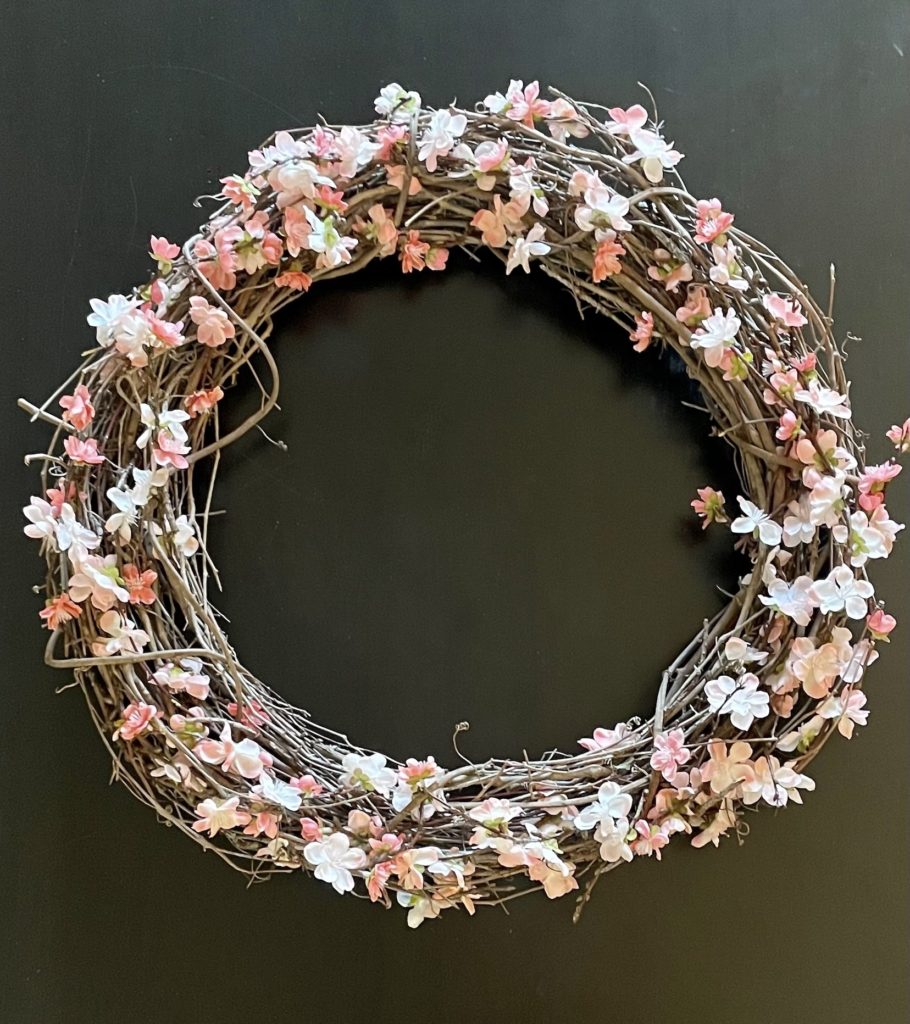
6. Up next, grab your accent flowers and repeat the same process.
In this case, my accent flowers are the white blossom sprays.
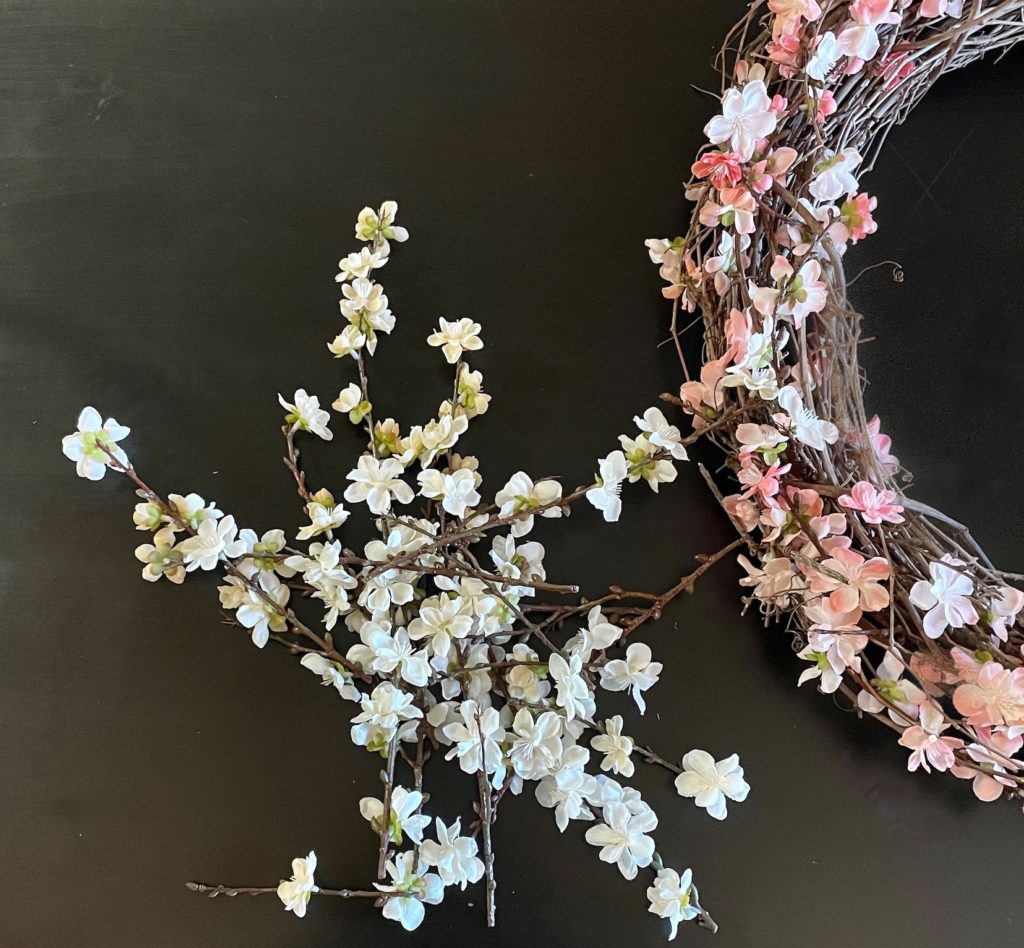
Here is what the wreath looks like after I cut and curved the white blossoms and placed them around the peach/pink ones that were already there:
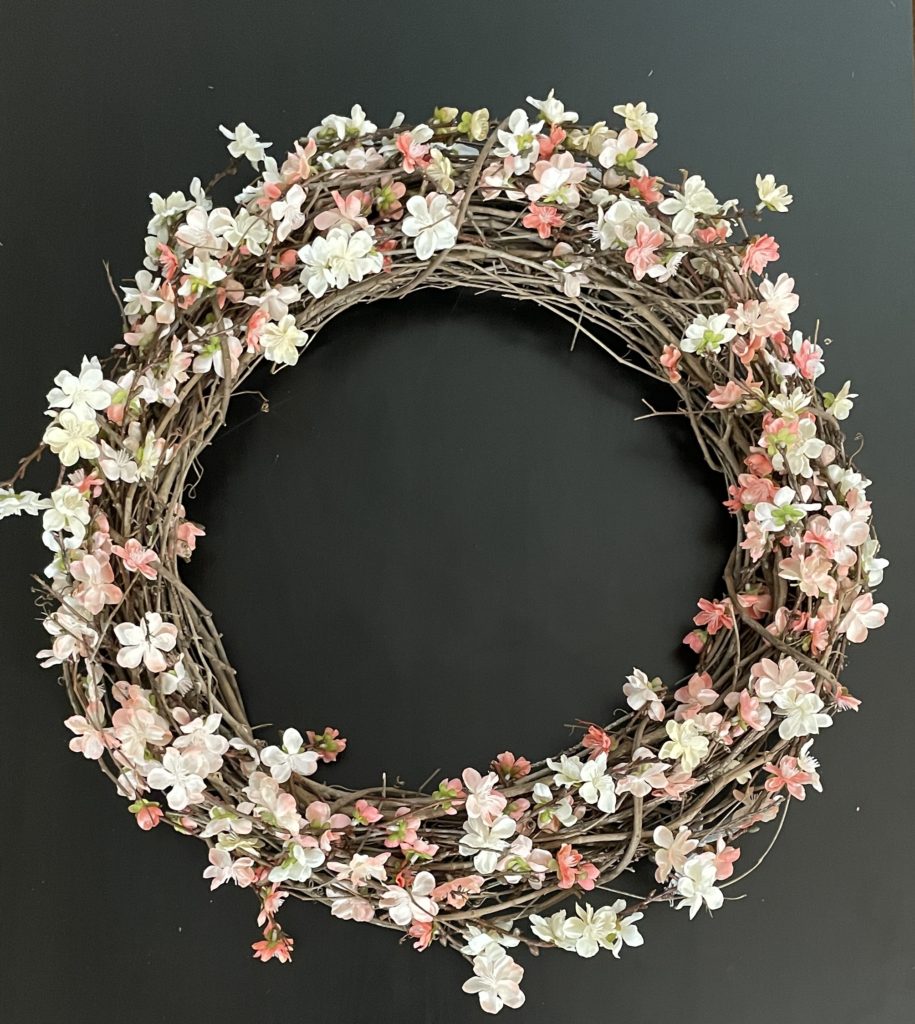
7. Add in any foliage or additional pieces to customize your wreath. Some folks add ribbons or holiday decorative items but I wanted some greenery to liven it up a bit.
I took a bushel I’d purchased a few years ago and cut 6 branches away from the stem to add to the wreath’s perimeter.
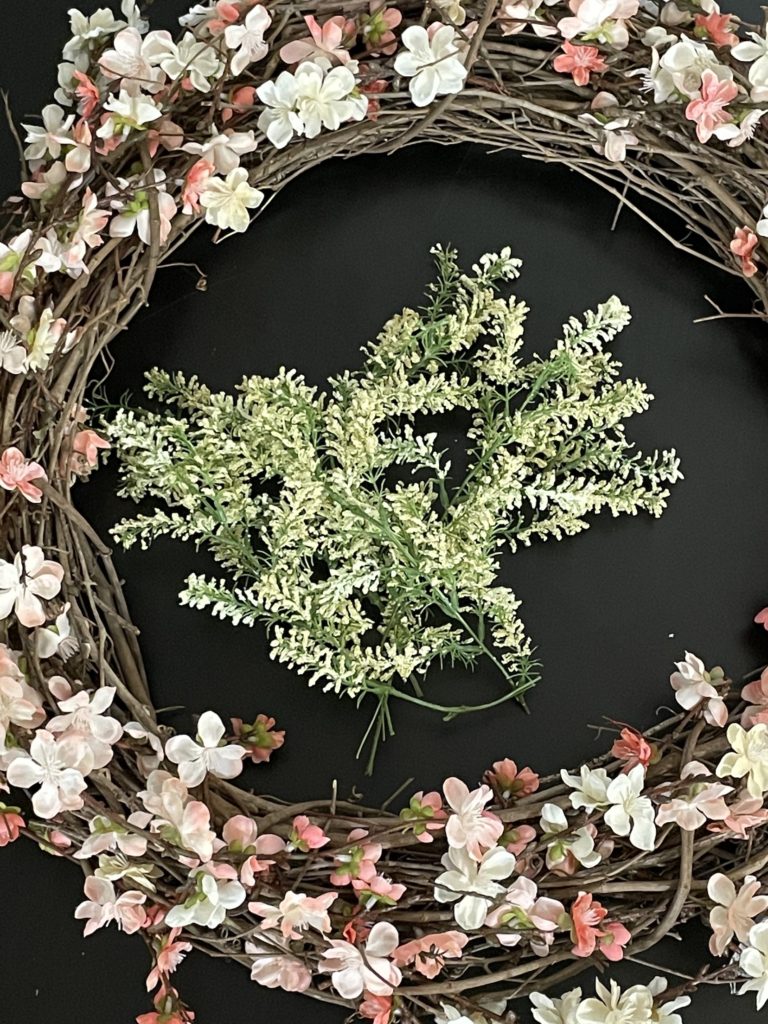
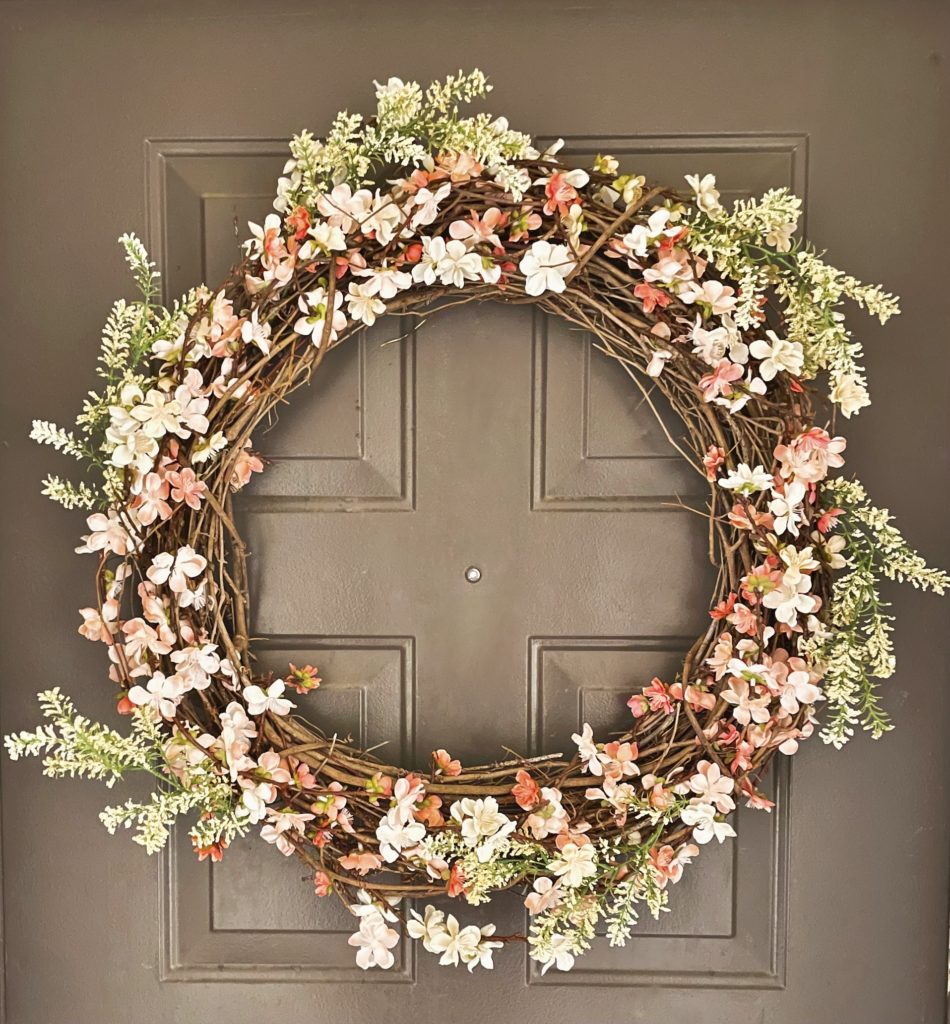
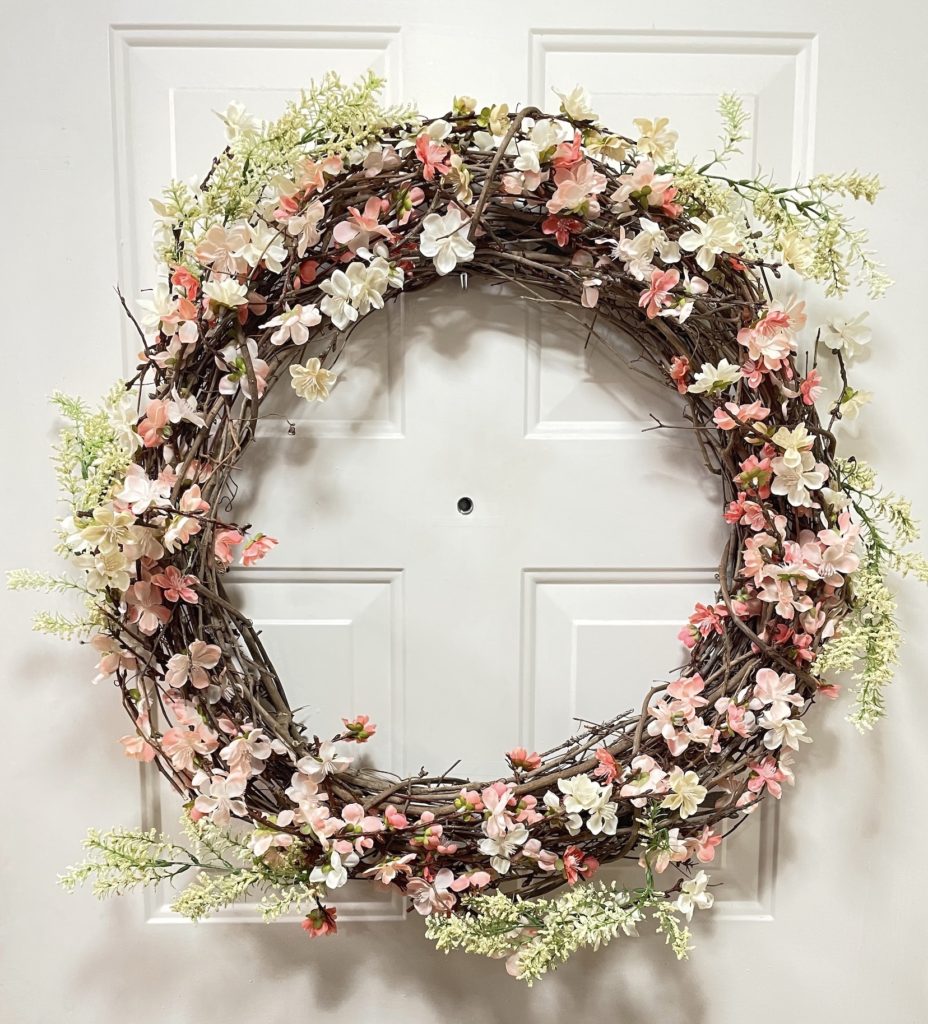
Here is the complete wreath with all the flowers and foliage added:
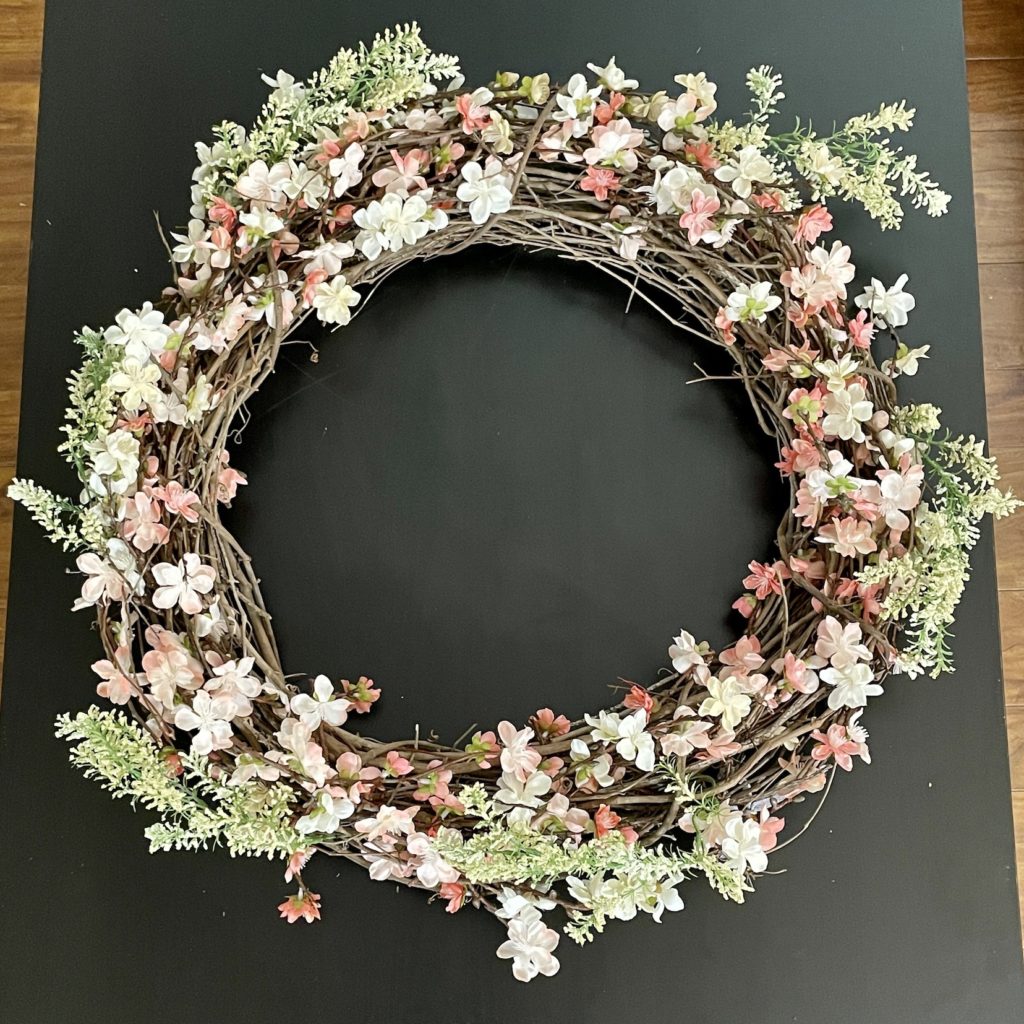
8. Now, pick up the wreath and shake it up and down to make sure every piece is secure. Continue to customize and move pieces around according to your preferences.
Step 5. Hang Your Wreath
While your wreath sits at your workspace, grab an alcohol wipe and go over the area where you will be attaching your wreath holder. Alcohol wipes are not needed if you plan to use a hooked magnet. You can use command hooks, wreath hangers, or my favorite – a strong hooked magnet.
Next, hang your wreath and check to make sure everything is secure.
Then, you’re all set!
(Here is what the wreath looks like inside (top) and outside with outdoor lighting (bottom))

CONCLUSION
I hope you enjoyed learning this quick and easy guide to help you make a spring wreath.
This is something I absolutely love doing, and I’m sure that if you repeat the same steps, regardless of the season, you will be able to create a fabulous wreath that you love too!
Don’t forget to tag me in your wreath photos and share which flower assortment you used. It might be the inspo for my next one 🙂
Until then, happy crafting!
